
builds
Smart Home Automation: ESP32 Multi-Channel Relay with WiFi Web Server
Control 230V AC home appliances (lights, fans, geysers) from anywhere on your local WiFi network or smartphone browser with isolated optocoupler relays.
Kunal (Founder & Owner) 2 min read13 Oct 2026
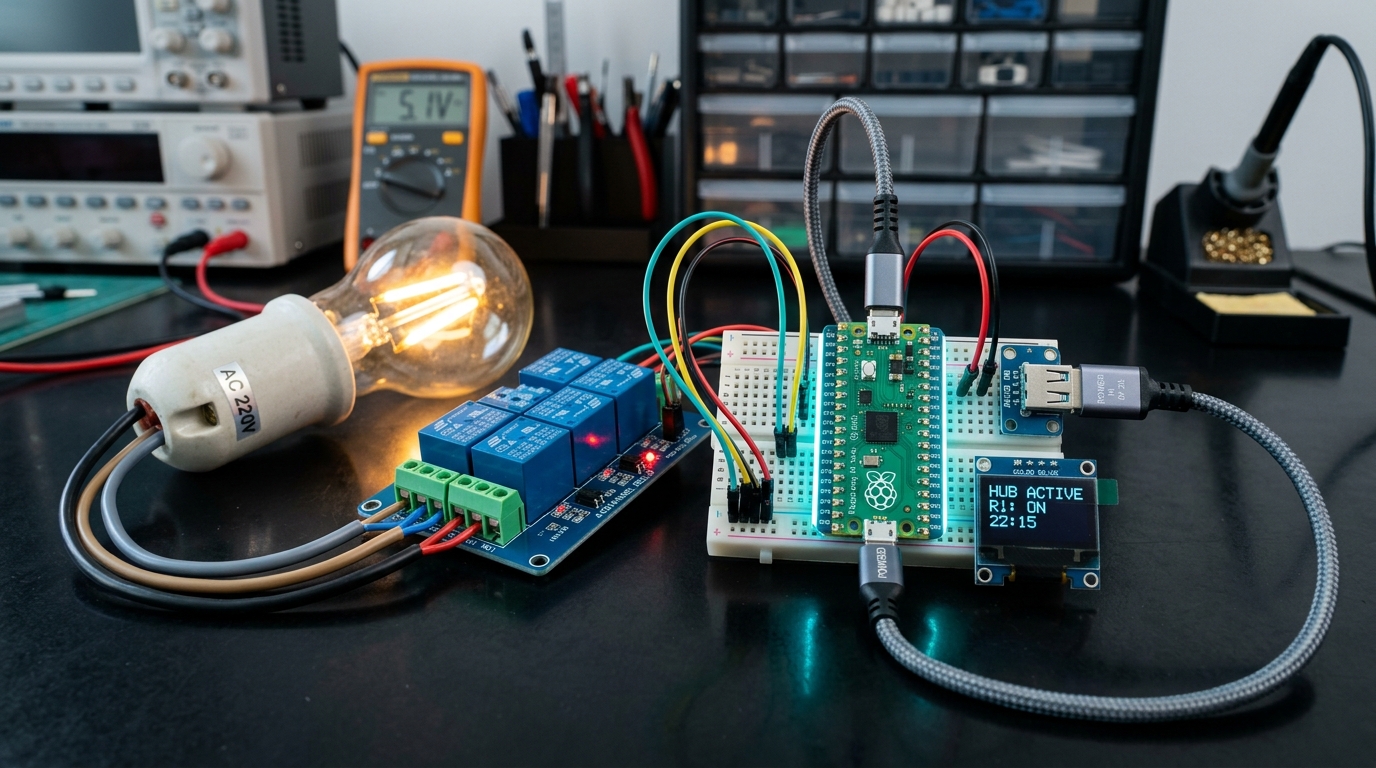
Smart Home Automation: ESP32 Multi-Channel Relay with WiFi Web Server
Home automation doesn't require expensive proprietary ecosystems. With an ESP32 and optocoupled relay modules, you can convert existing household switchboards into intelligent, network-controlled sockets with responsive state feedback.
Safety Warning: Working with 230V AC mains electricity poses lethal shock risks. Always disconnect main circuit breakers before touching high-voltage wiring, and ensure relays have adequate creepage distance.
1. System Architecture
   [ Browser / Mobile ] ──► (HTTP Request) ──► [ ESP32 Web Server ]
                                                      │
                       ┌──────────────────────────────┴──────────────────────────────┐
                       ▼                                                             ▼
             GPIO 26 ──► Relay 1 (Optocoupled)                             GPIO 27 ──► Relay 2 (Optocoupled)
                              │                                                             │
                         [ 230V AC Light ]                                             [ 230V AC Fan ]
2. Wiring Connections
- ESP32 5V (VIN) → Relay Module VCC
- ESP32 GND → Relay Module GND
- ESP32 GPIO 26 → Relay IN1
- ESP32 GPIO 27 → Relay IN2
- Connect the AC live wire through the Common (COM) and Normally Open (NO) contacts of each relay.
3. Production ESP32 Web Server Firmware
cpp#include <WiFi.h>
#include <WebServer.h>

const char* ssid = "YOUR_WIFI_SSID";
const char* password = "YOUR_WIFI_PASSWORD";

WebServer server(80);

const int RELAY_1 = 26;
const int RELAY_2 = 27;

bool relay1State = false;
bool relay2State = false;

void sendPage() {
  String html = "<!DOCTYPE html><html><head><meta name='viewport' content='width=device-width, initial-scale=1'>";
  html += "<style>body{font-family:sans-serif;background:#0f172a;color:#f8fafc;text-align:center;padding:20px;}";
  html += ".btn{display:inline-block;padding:15px 30px;font-size:18px;margin:10px;border-radius:12px;text-decoration:none;font-weight:bold;}";
  html += ".on{background:#10b981;color:#fff;} .off{background:#ef4444;color:#fff;}</style></head><body>";
  html += "<h2>Unik Smart Switch Hub</h2>";
  html += "<p>Relay 1 (Living Room Light): <a class='btn " + String(relay1State ? "on" : "off") + "' href='/toggle1'>" + (relay1State ? "ON" : "OFF") + "</a></p>";
  html += "<p>Relay 2 (Ceiling Fan): <a class='btn " + String(relay2State ? "on" : "off") + "' href='/toggle2'>" + (relay2State ? "ON" : "OFF") + "</a></p>";
  html += "</body></html>";
  server.send(200, "text/html", html);
}

void setup() {
  pinMode(RELAY_1, OUTPUT);
  pinMode(RELAY_2, OUTPUT);
  digitalWrite(RELAY_1, HIGH); // Active LOW relay default OFF
  digitalWrite(RELAY_2, HIGH);

  WiFi.begin(ssid, password);
  while (WiFi.status() != WL_CONNECTED) delay(500);

  server.on("/", sendPage);
  server.on("/toggle1", []() {
    relay1State = !relay1State;
    digitalWrite(RELAY_1, relay1State ? LOW : HIGH);
    sendPage();
  });
  server.on("/toggle2", []() {
    relay2State = !relay2State;
    digitalWrite(RELAY_2, relay2State ? LOW : HIGH);
    sendPage();
  });

  server.begin();
}

void loop() {
  server.handleClient();
}
Parts used in this tutorial
Buy them in one click — ships from Pune across India.
- ESP32 Development Board with WiFi & Bluetooth – CH340C USB Type-CMicrocontrollers₹419.00+ GST
- Relay Module 5V 10A (2-channel)Power & Components₹75.88+ GST
- Relay Module 5V 10A (1-channel)Power & Components₹45.53+ GST

Approx. total ₹540.41 (before GST)Add all to cart
#iot#smarthome#esp32#relays
Found this useful? Tell us what you'd like to read next via our RFQ form.